The night sky has always called to us. Long before electric light washed it away from our cities, humans looked up and felt the pull of something vast, ancient, and alive. Astrophotography is, at its heart, an act of reclaiming that wonder, and it’s more accessible than you think.
You don’t need expensive gear to start
One of the great myths of astro landscape photography is that you need thousands of dollars in equipment before you can capture anything worthwhile. You don’t. A DSLR or mirrorless camera, a wide-angle lens with a reasonably fast aperture (f/2.8 or wider is ideal), a sturdy tripod, and a remote shutter release are all you truly need to get started.
The camera you already own is probably capable of producing images that will leave you speechless. What matters far more than gear is your understanding of light, planning, and patience.
Plan your shoot before you leave home
Great astro landscape photography rarely happens by accident. The photographers whose images stop you in your tracks have almost always visited their location during daylight first. They’ve walked the ground, assessed the foreground, understood where the shadows fall, and noted any hazards. When darkness arrives, they’re not stumbling around, they’re composing.
Apps like PhotoPills and The Photographer’s Ephemeris are invaluable tools here. They let you overlay the Milky Way arc on your location, plan exactly where the galactic core will rise, and time your shoot to align stars with a specific foreground element. A weathered fence post, a mountain ridge, an old stone building. This kind of intentional composition is what separates a snapshot of the night sky from a truly compelling image.
Before you leave home, also check:
- Moon phase: A full moon floods the scene with light (great for foregrounds, not so great for stars). New moon nights give you the darkest skies.
- Light pollution maps: Tools like lightpollutionmap.info will show you which direction to shoot and how far you need to travel from the city.
- Weather forecasts: Cloud cover is the enemy. Clear, low-humidity nights produce the sharpest stars.
- Your equipment: Check your batteries, format your memory cards, and confirm your lens is in your bag before you’re 90 minutes from home. Don’t forget your tripod and attachment for your camera!
Understanding the triangle: ISO, aperture & shutter speed at night
Shooting at night requires a different mindset than daylight photography. Your goal is to gather as much light as possible while keeping stars sharp, and stars move. Even on a fixed tripod, the Earth’s rotation means stars will trail (blur into streaks) if your exposure is too long.
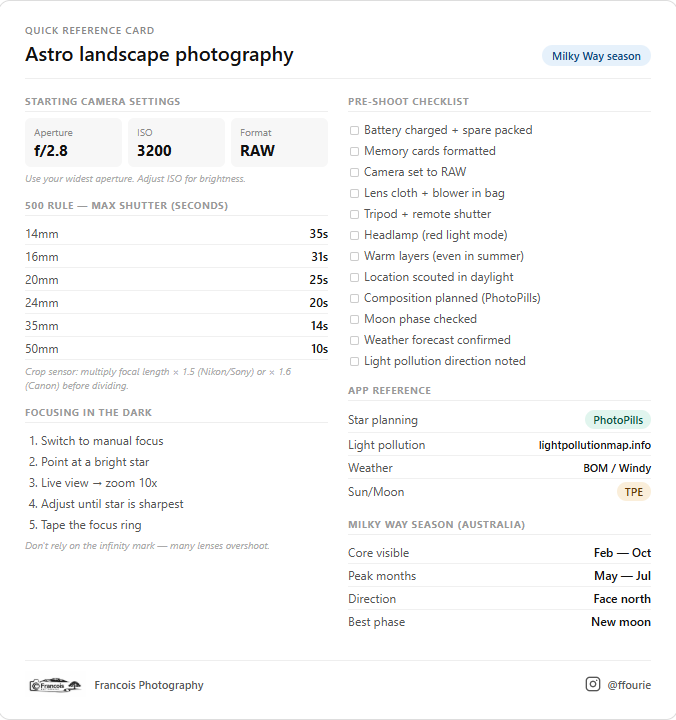
A useful starting point is the 500 Rule: divide 500 by your focal length to get the maximum exposure time in seconds before trailing becomes visible. On a 24mm lens, that’s roughly 20 seconds. On a 14mm, you can push to about 35 seconds.
Typical starting settings for astro landscapes:
- Aperture: f/2.8 (or your widest)
- ISO: 1600–6400 depending on your camera
- Shutter speed: 15–25 seconds (crop sensor) or 20–30 seconds (full frame)
Don’t be afraid of high ISO! Modern cameras handle noise remarkably well, and a slightly noisy image of the Milky Way is infinitely more rewarding than no image at all.
The foreground is half the story
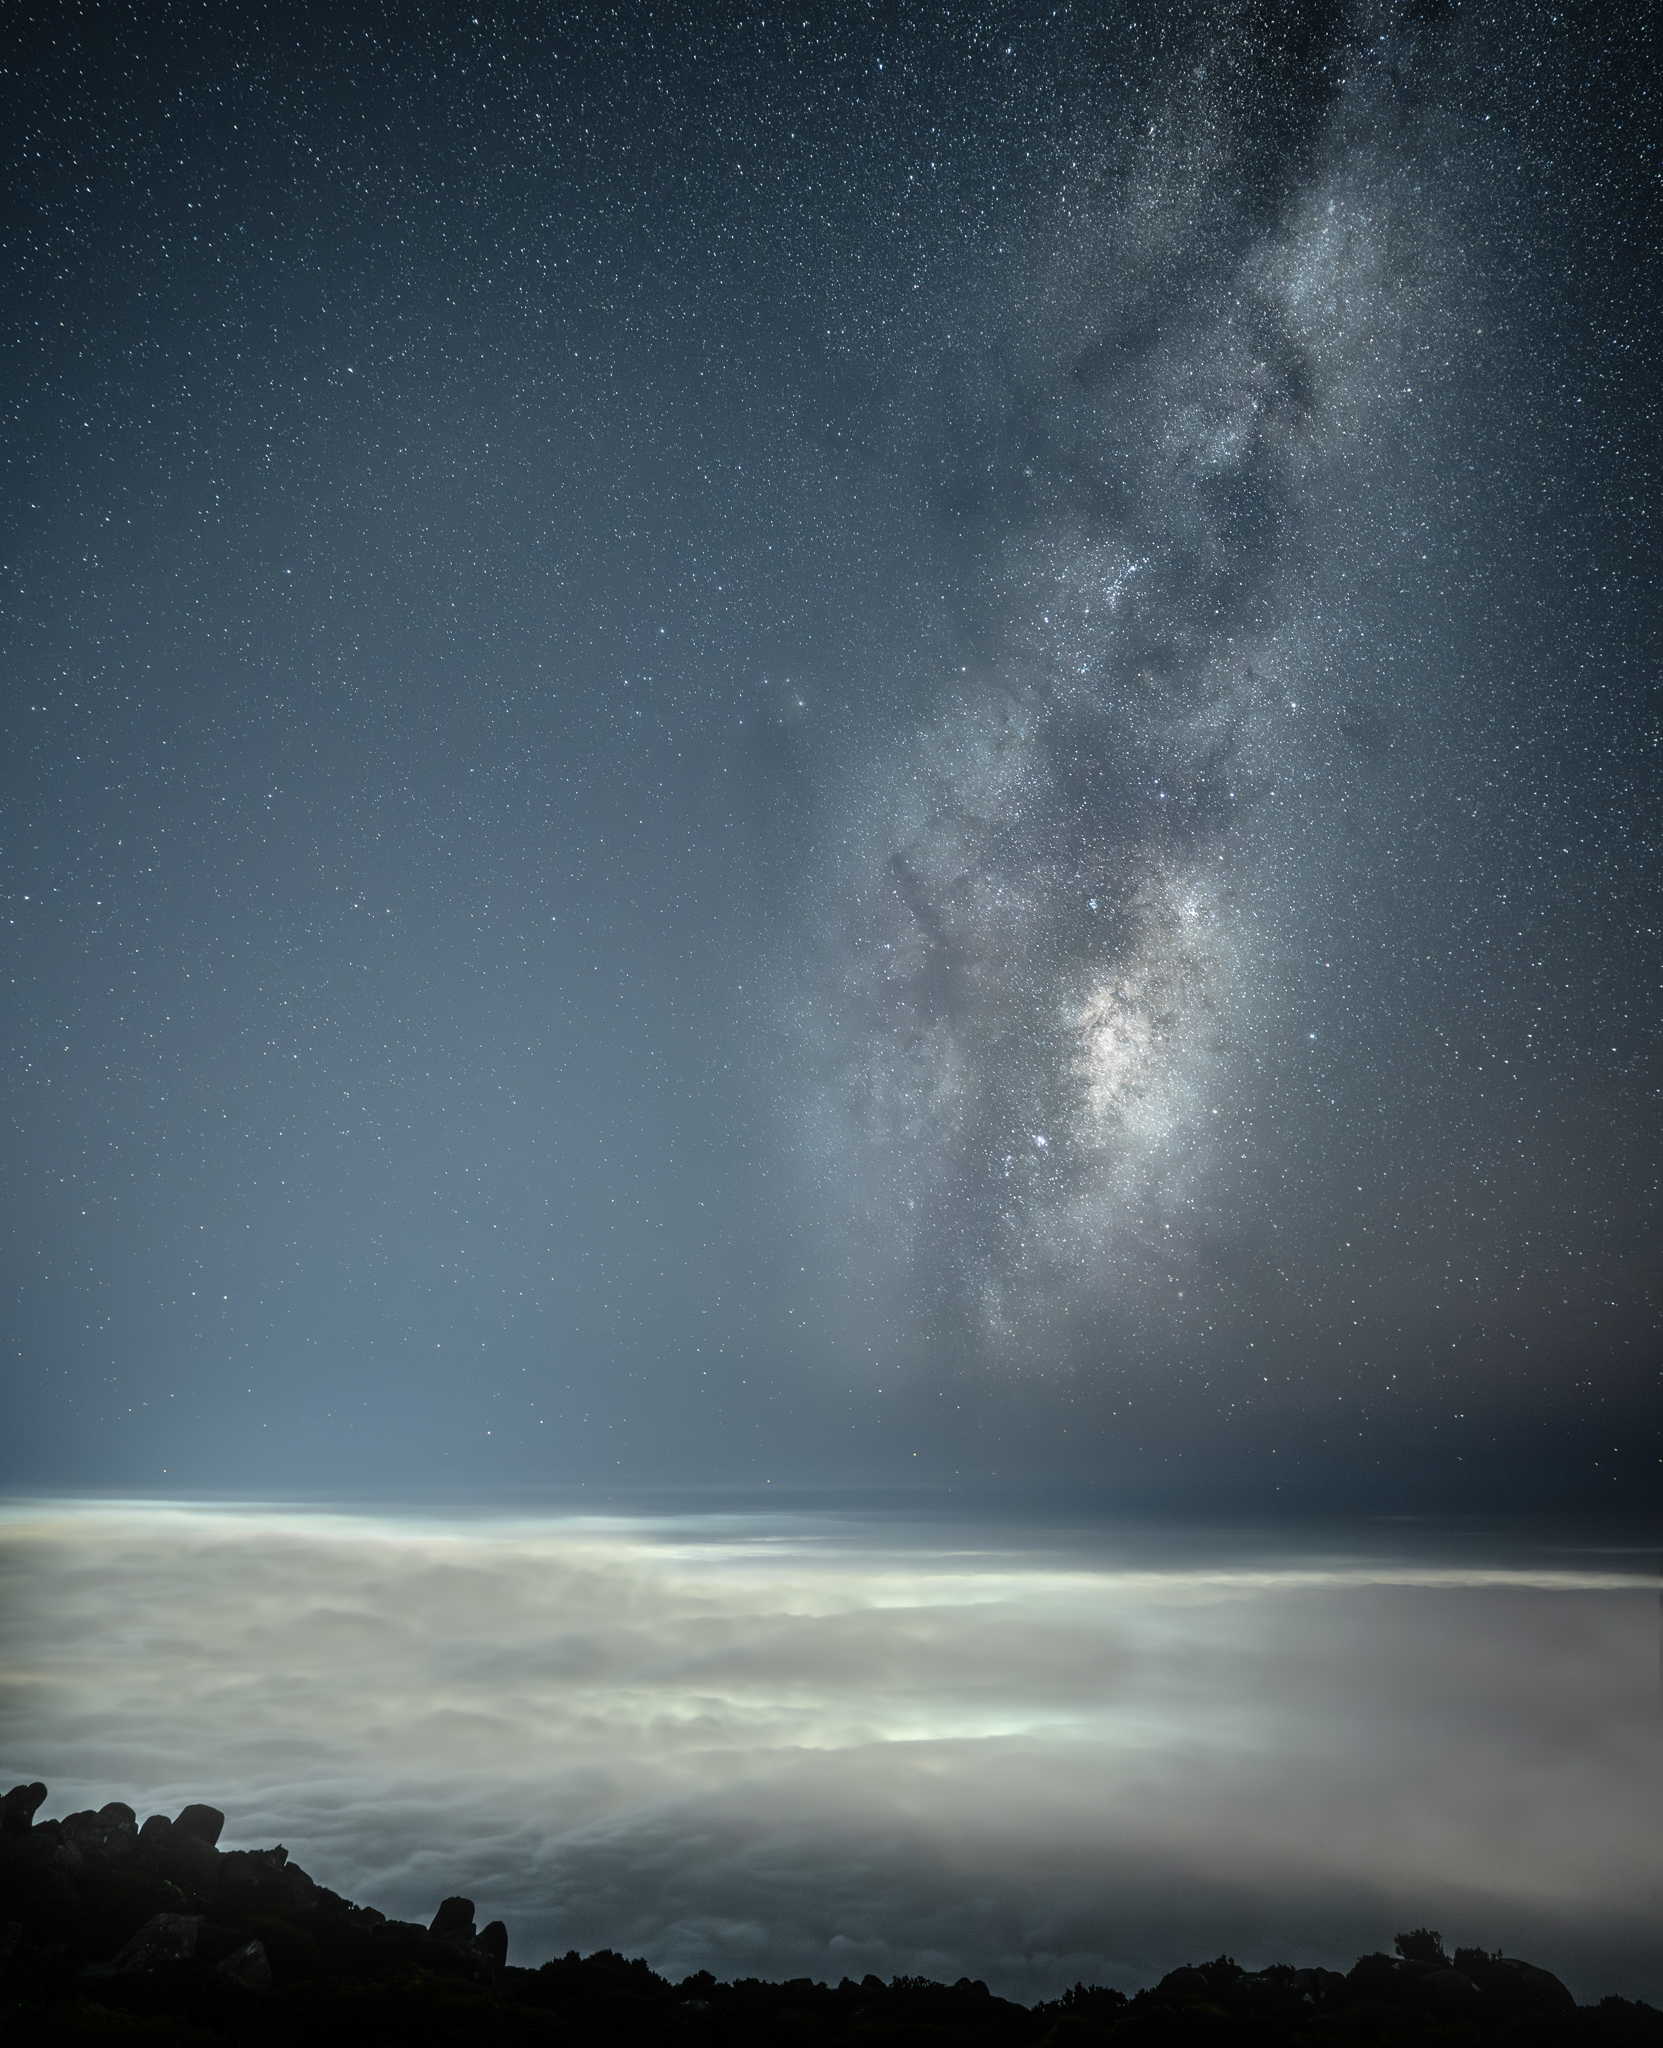
A photograph of the night sky alone is impressive. A photograph of the Milky Way arching over a crumbling shack, a glassy lake, or a wind-bent tree is unforgettable.
The foreground anchors your image to the Earth. It gives the viewer a sense of scale and place. It transforms an abstract sky into a story. Spend as much time thinking about your foreground as you do about your star settings.
Strong foreground elements for astro landscapes include:
- Bodies of water (for reflections)
- Interesting natural shapes – rock formations, lone trees, coastlines
- Human-made structures with character – old farm buildings, lighthouses, jetties
- Terrain with leading lines that draw the eye upward toward the stars
Shooting low. Getting your camera closer to the ground can dramatically improve the sense of depth and drama in a composition. It’s one of the simplest and most effective techniques you can adopt immediately.
Focusing in the dark
Manual focus is essential for night photography. Autofocus struggles with low light and will hunt endlessly, often locking on nothing. Here’s a reliable method:
- Switch your lens to manual focus.
- Point your camera at a bright star or distant light.
- Use live view and zoom in digitally (10x magnification) on that point of light.
- Slowly turn the focus ring until the star is as small and sharp as possible.
- Lock your focus (tape the ring if you’re prone to bumping it).
Don’t rely on the infinity mark on your lens, many lenses focus slightly past true infinity, and you’ll end up with soft stars.
Light painting: bringing your foreground to life
One technique that transforms astro landscapes is light painting. Using a torch, LED panel, or off-camera flash to selectively illuminate your foreground during a long exposure.
The key is subtlety. You’re not trying to recreate daylight; you’re adding just enough light to reveal texture and detail while maintaining the mood of the scene. A warm-toned light source can add a beautiful, natural feel to structures like old buildings or wooden jetties.
Post-processing: where the image comes alive
Capture is only half the process. The RAW files from a night shoot will look flat, noisy, and disappointing straight out of the camera. Post-processing is where you honour the scene you experienced.
In Lightroom or Capture One, a typical astro landscape edit involves:
- Pulling back highlights to control any bright elements
- Lifting shadows carefully – go too far and noise becomes overwhelming
- Boosting clarity and texture to bring out star detail and foreground texture
- Colour grading – the Milky Way has genuine colour: pinks, yellows, and greens from nebulae. Enhancing these subtly adds drama without looking artificial
- Noise reduction – dedicated tools like DxO PureRAW or Lightroom’s AI Denoise have made this dramatically easier in recent years
What to bring: a checklist for your first night shoot
Essential:
- Camera body and fully charged spare battery (cold kills batteries fast)
- Wide-angle lens (f/2.8 or faster)
- Sturdy tripod
- Remote shutter release or intervalometer
- Headlamp (red light mode preserves your night vision)
- Warm layers – it gets cold fast, even in summer
Highly recommended:
- Lens cloth and blower (dew can be a problem)
- Hand warmer or lens heater band
- Spare memory cards
- A simple torch for light painting
- A sense of adventure, and willingness to learn, and get creative
The most important thing
Equipment matters far less than you think. Planning matters a great deal. But the single most important ingredient in astro landscape photography is this: go out. The perfect night will never arrive if you wait for it. The night sky rewards patience and presence.
Every clear night is an opportunity. Every dark paddock, every quiet beach, every hillside away from city glow is a studio. All you need to do is show up.
Interested in experiencing the night sky through your own lens? Join one of our upcoming astro landscape workshops – small groups, dark skies, hands-on guidance every step of the way.